ChatGPT · PRACTICAL GUIDE
Turn a research summary into a clear presentation with ChatGPT
Plan a six-slide story, set a consistent visual direction, and review generated slide images before assembling your presentation.
Watch the original tutorial
Open the original video on YouTube ↗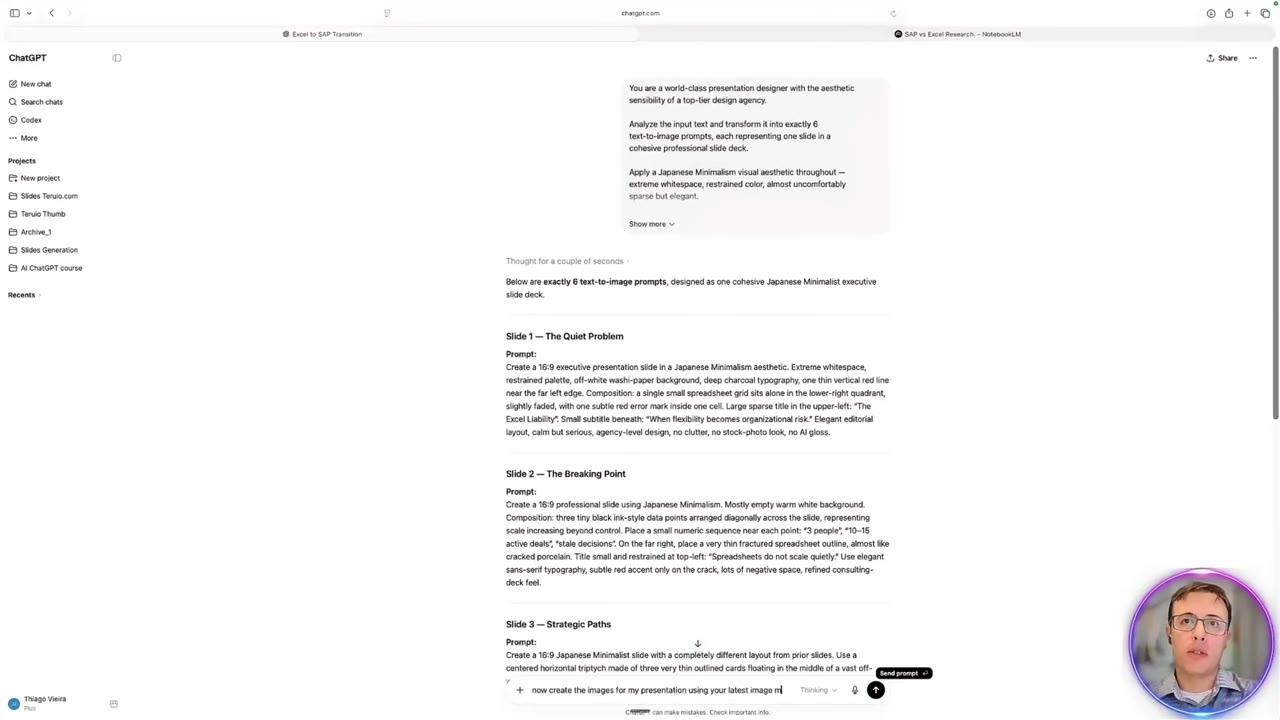
A deck can contain correct research and still be difficult to present. In Thiago’s example, an SAP-versus-Excel presentation comes back with too much text and too little visual structure. He reuses the research, chooses a minimalist visual direction, and asks ChatGPT to develop the slides.
What you’ll learn
- Separate the argument from the slide design.
- Give ChatGPT a specific visual brief.
- Test a small set of slides before generating the whole presentation.
- Review readability, factual accuracy, and the final file format.
Before you start
Bring a checked research summary and the decision your audience needs to make. The video reuses a summary from NotebookLM research. Keep the original references alongside it, especially for numerical claims.
This walkthrough demonstrates generated slide images. A set of images is not automatically an editable PowerPoint deck. Decide whether the final delivery needs editable charts, accessible text, speaker notes, or a particular presentation format before choosing how to assemble it.
1. Write the story before choosing a style
Describe the audience, the meeting’s purpose, and the requested decision. For example, a leadership presentation about project tracking needs to explain the problem, compare options, and identify a next step. It does not need to reproduce every paragraph of the research.
Ask for a six-slide outline. Review the headline and supporting evidence for each slide. A useful sequence is the decision, the current problem, comparison criteria, evidence, tradeoffs, and the proposed next step. Adjust that sequence to your actual argument.
2. Give a concrete design brief
The demonstration uses a Japanese minimalist direction: restrained layouts, generous white space, and consistent typography. You can choose another direction that fits your organization. Describe visible design choices instead of relying only on a style label.
Use this adapted prompt with your own summary:
Develop a six-slide presentation for [audience] about [decision]. Use the research below as the factual source. Give each slide one clear headline, a short supporting statement, and a proposed visual. Use generous white space, a restrained palette, consistent typography, and a clear alignment grid. Preserve source references. Flag missing evidence rather than adding statistics. First return the outline for review. Research: [paste summary].
The prompt is a starting point. Replace generic recommendations with the conclusion your evidence supports, and identify any assumption that still needs discussion.
3. Generate one or two slides first
After approving the outline, request the opening slide and one content-heavy slide using the image-generation capability available in your account. Tell ChatGPT to keep the same visual language across both.
The content-heavy slide is an important test. A beautiful title page does not prove that the style can handle comparisons, labels, and references. Check whether the visual explains the idea or simply decorates it. If the text is crowded, reduce the material or split the slide before generating more.
4. Revise the design with specific feedback
Give observable instructions: shorten the headline, increase the chart labels, move the source note away from the edge, or use the same margins as slide one. Keep factual corrections separate from style changes so they are easy to verify afterward.
For every generated image, compare numbers, spelling, labels, and citations with the approved outline. Recreate charts from verified data when accurate values or later editing matter. Do not accept invented bars or labels because the image looks polished.
5. Assemble and test the presentation
Place approved assets in your chosen slide editor. Add editable text, notes, and references where required. Open the exported file and check every slide at presentation size. If an image contains all the text, consider whether your audience also needs a readable text version.
Rehearse the transitions aloud. Each slide should advance the argument, and the final slide should make the requested decision or next action explicit. Save the design brief and outline structure as reusable references for future decks.
Common questions
Can I start with an old presentation?
Yes. Extract its useful evidence and structure first. The video starts fresh visually while retaining the underlying research; it does not treat a redesign as new research.
Will the image output be an editable deck?
Not necessarily. Confirm the actual output format and rebuild elements that need editing. Review the finished file rather than assuming a preview image proves the whole deck works.


